Friday, September 30, 2016

Travel Scrapbook with CTMH Everyday Life Album

Do you ever have GREAT plans to scrapbook an event or a trip,but by the time you get home you're just too exhausted catching up with life?  I sell scrapbooking supplies and I can't even begin to tell you how many trips and conventions that I haven't scrapbooked yet....Yet.... Someday, I will get them done.

Well a couple of months ago I came up with an idea and I think it is sheer brilliance!  Why not prep my supplies BEFORE my trip and then scrapbook while I'm traveling.  It could work, right?  I was excited to plan my trip so why not harness that excitement and plan what I needed to scrapbook it.

I made lists.  I bought supplies.  I tested my equipment and now it's time to go.  So let's see... can I scrapbook while I'm traveling?

Here's video #1 - I share the supplies I packed and the things I prepped before my trip.


Supplies Used:

I packed everything in Z4138 Small Organizer and it worked perfectly!!  I had to work on a couple of other projects during my trip so I did have my basic tool kit with me.  I found that I needed the journaling pen and my scissors from that kit.

Z9979 Everyday Life Album (also available in Sea Glass Z4027)
Z9978 My Crush Adventure Calls (30 double sided pages)
Various "state stamps" from Close To My Heart (Utah, Wyoming...)
Shimmer trim - various colors available
Z553 Bonding Memories Glue Pen
Z4138 Small Organizer
Artbooking and Flower Market Cricut Cartridges

You can order your supplies on my website.  I love it when you support me by purchasing from my site!
Monday, September 12, 2016

Faux Metal Embellishments using CTMH Thin Cuts


I love finding new ways to use my tools and products and I have been a bit obsessed with our thin cuts lately.  I love using them to cut glitter paper.... and now... I love using them to make faux metal embellishments!!

While I used thin cuts in the video below, you could use this technique on items you cut from your cricut as well.


Get all of your CTMH products here :-)


Products Used:
Z555 Craft Heather
Z2067 Ranger Silver Super Fine Embossing Powder
Z891 Versamark Ink
Z2045 All-Purpose Mat
Z553 Bonding Memories Dual Action Glue Pen


Available until December 31, 2016
X7212B Swan Lake Paper Packet


Available until September 30, 2016
S1609 Blessed Beyond Measure - August Stamp of the Month

Thursday, September 08, 2016

CTMH Jeepers Creepers Halloween Wreath using Dollar Tree Wire Frame!


I love it when a project comes together so quickly!  I watched this video from Close To My Heart (CTMH) a month or so ago and I immediately knew I would be reinventing it for multiple holidays and seasons.  I bought my wire frame wreath from Dollar Tree, put it on my table and there it sat....  I couldn't decide what season to make first. LOL


Buy Your Jeepers Creepers Paper and Complements Here


Here are a few tips and tricks I came up with:

  • Tie tulle between the papers. Adds dimension and keeps the paper from sliding around the wreath
  • Make it more "Halloween" by creating a jagged edge instead of the dovetail edge featured in the video.
  • You can create a completely different look by flipping over the two-sided paper!  I went with the purple/green/black color scheme.  By flipping just a couple of pieces I could have pulled in the orange or "monster" theme.


Cutting dimensions:
15 strips of paper 2" x 12" (3 each of five different paper designs)
Center pieces 2 1/4" x 12"


Tuesday, September 06, 2016

DIY Gold and Silver Acetate Boxes for Cookies and Gifts

I absolutely love to personalize the gifts I give by dressing them up with pretty cards and boxes.  Even better when I can DIY my own box or bag to perfectly fit!!

My hostess last week makes the most AMAZING cookies so when I was planning the projects to share at her party, I knew I had to share something fun that she could use to package her cookies.  (Please note - I'm not a baker, I imagine cookies will be put in food safe bags first.)

I used the new Fundamentals All About Gold acetate sheets to create these quick and easy boxes and now I am addicted and I keep coming up with more cool ways of using these sheets (stay tuned!!)

Here's a video to show you how to make them.  I've included measurements below.


DIY Acetate Box Measurements

Buy Your All About Gold Acetate Here

Top/Bottom - Cardstock
4.25"x 4.25"
Score at 11/16 from each edge.

Acetate Middle
You can choose any height.
Samples are 4" x 11.5" and 6" x 11.5"
Score along 11" side at 2.75", 5.5". 8.25" and 11"

Embellishments
Z3260 Thin Cuts - Hearts
Flower Market Cricut Cartridge - Buy Your Cartridge Here 


Wednesday, August 24, 2016

Watercolor Wednesday - Use your stamp pads!!

Hello there and welcome to another Watercolor Wednesday!!  This week I am sharing how you can use your stamp pads to watercolor.  I love this technique because I often feel color challenged.  What colors go together??  How do you know for sure?  Well if you want to match your Lagoon paper, why not pull out your Lagoon stamp pad?

This technique will work with your dye based stamp pads.  I love the new CTMH stamp pads because the lid comes completely off and then it's almost like a mini paint pallette!


You can order your stamp pads directly from my site!  Click Here  

Please note that the new pads are only available in a small assortment of colors at the time that I am writing this blog post.  Be sure to select the pads that say "New" next to them and look like the ones featured in the video. and the picture below.


Wednesday, August 17, 2016

Watercolor Wednesday - Plastic Wrap Technique

Welcome to another Watercolor Wednesday!  This week I am playing with plastic wrap to create an interesting background.

Here's a quick video to show you how!


Supplies Needed:
Watercolors
Watercolor Paper
Plastic Wrap - You can use a variety of plastic.  I've even used a plastic grocery bag.

Did you try the technique?  I'd love to see your creations!


Monday, August 15, 2016

CTMH Rustic Home and Flower Market Daisies

I cannot tell you how much fun I had making this card!!!


It all started because I decided that I was going to use the Daisies from the Flower Market Cricut Cartridge as the theme for a birthday party at my work. I got started by cutting a bunch of daisies.  I mean if you're going to cut one... why not cut a bunch, right?  FYI - the centers take a really long time to cut. LOL


So I had this little pile of Daisies on my desk and I suddenly thought they would look fabulous on craft paper.  The minute I pulled out my Rustic Home Fundamentals Paper Packet, I knew it was going to be the perfect combination!!


Products Used - Click Here to Buy Them Now. 

CTMH Flower Market Cricut Cartridge 

Rustic Home Fundamentals Paper Pack

Cocoa, Honey, Canary and Barn Red (Retired) Cardstock


Wednesday, August 10, 2016

Watercolor Wednesday - River Wash Card

Hello there!  Welcome to Watercolor Wednesday.  Each week I share a fun watercolor technique or card.  This week it's back to basics with a very simply "watercolor wash."  You can create a ton of great cards and scrapbook pages just by washing some color onto your project and then add the stamped images of your choice.

Here's a video with this week's technique:


Did you see some fun supplies that you need to add to your collection?  I'd love it if you'd support me by purchasing through my retail site!!

Supplies Available at my retail site:
Watercolor Paper
Z3132 Watercolor Paints
Z3226 Waterbrush
Z3188 Paintbrush Set
z899 Memento Ink Pad
Z2045 All purpose mat

Thursday, August 04, 2016

No Coloring Books For Me!! - This is my coloring fun...

I love it when I find time to relax and color!!  Instead of coloring books, I like to stamp up some images, color them in and then use them on cards, gifts, tags...

Here's a sweet birthday card I made using the new set B1532 Sweet Birthday.


I used Prismacolor Pencils and a blending pencil.  I usually like to use odorless turpenoid and blending stumps to blend, but it can be a hassle dealing with liquid when you're away from home or your desk, so the blending pencils are a nice alternative.

I used our new Simple Chevron embossing folder for the background, along with Lagoon and Raspberry Cardstock.


You can't see it in this picture, but live and in person the frosting is glittery goodness thanks to my new FAVORITE product - The Shimmer Brush.  It's like a waterbrush with glittery goodness inside.  For some reason I feel the need to add it to everything.

If you would like to order any of these products I'd love it if you would support my business by shopping at my retail site.  Stamptildawn.ctmh.com


Wednesday, August 03, 2016

Watercolor Wednesday - Masculine Card

Welcome to Watercolor Wednesday!  I have been having so much fun creating with watercolors that I decided to create a whole series of posts that will appear on Wednesday's.  I haven't been blogging much, so in the spirit of moving forward and just getting it done...I'm just going to post today's card and info.  I have some tutorials and basic info to share, but I'll put that in some future posts.

Here is today's card...


Watercolor Tips

  • Cut your watercolor paper about 1 inch bigger than the image you plan to stamp.  
  • Choose the colors that you would be likely to use if you were coloring in the stamp and just do a band of color.
    • Do a quick watercolor wash (lots of water, little bit of color) on your paper.  
    • Let dry
    • Stamp Image


    Quick, Easy and Done!!  You don't have to actually watercolor the fine details of the image.


    The wood grain paper is from our new Rustic Home Fundamentals Paper Pack.(Z3262) Oh how I love this paper!!!!  I'm sure I will use it so much that you will get sick of seeing it.  The wood grain has a brown tint on one side and a grey tint on the other.  How smart is that?

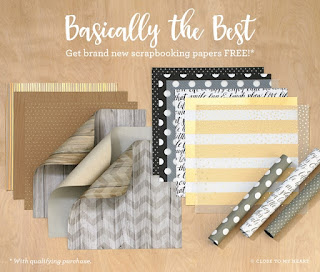
    Want to get the Rustic Fundamentals FREE??


    During the month of August, when you order our Whimsy, Adventure, and Enchantment Fundamental papers, you can choose to get either the Rustic Home or Uptown Fundamentals for FREE! Both of these Basics packets feature foil designs and specialty materials for making your artwork unique. Yep, this deal is basically the best!


    Tuesday, March 01, 2016

    Get ready to make March colorful!!

    Woo Hoo!!  March is here and that means...it's time to start sharing my color videos.

    This first video gives you an introduction to the products and techniques I will be sharing in the rest of the series.  I give you some tips about my favorite colored pencils and some ideas of products you can share with friends.

    I hope you like the video!  Please let me know if you have any questions or if there are any specific techniques you'd like me to show in future videos.


    March is Stampaganza Month!!!  Buy two stamp sets, get one of equal or lesser value FREE!!!  Head on over to my website to place your order.


    Friday, February 26, 2016

    Hooked on Coloring? Check out my new Video series for March!


    Have you joined in on the coloring craze?  I bought a coloring book a couple of years ago and I pull it out now and then but sometimes I have a hard time finishing the page.  Has that happened to you?  And what do you do with it when you're done?  Some of them take hours and hours to complete....

    Well, let's create our own coloring fun and turn them into fun gifts, cards and decorations!!!

    Throughout the month of March I will be releasing a series of videos that will share some fun coloring tips and techniques.  I will be sharing ideas for chalks, markers, colored pencils, watercolor, watercolor pencils and sponging.  Along the way I will show you how to turn your coloring fun into cards, gifts and decorations.  I'll also share travel tips and my favorite products.

    Don't miss out on any of the fun.  Be sure to follow me on facebook and youTube.

    ****BARGAIN ALERT*****


    I had this series planned before I found out that March is Stampaganza at Close To My Heart!!!  That means you can purchase the same stamp sets I'll be featuring all month long and get a great deal.

    Here are some of the stamp sets I will be using. (I may integrate a few other sayings, etc.)

    • C1638 Spring Critters
    • C1640 Friend in Me
    • C1643 Stuck on You
    • S1603 - March Stamp of the Month - Spring Birdies.


    Well during STAMPAGANZA...you can buy two stamp sets and get a third free.  So buy the first two on the list, get the third one free.  Add a few other stamping supplies you will need like White Daisy Paper or our amazing Watercolor paper and when your order reaches $50, you can get S1603 for only $5


    Don't forget to wait until March 1st to place your order so you get the DEAL!!!

    Let me know if you want to turn it into a party and earn free products.  I'll open an online party for you and your friends to order from.


    Wednesday, January 13, 2016

    CTMH January SOTM - S1601 2nd Generation Stamping Technique


    I am loving the January Stamp of the Month!  It is such a versatile stamp set.  I can see myself finding uses for it all year long.  There are 14 stamps in the stamp set and it includes the following sayings:


    • You mean so much to me
    • Love You!
    • Thinking of You
    • Happy Valentines Day!
    • Hugs, kiss and Valentine wishes.
    • Love is not a matter of counting the years, it's a matter of making the years count.

    At my workshop this month I showed the Second Generation Stamping Technique.  This technique is perfect for this stamp set and really helps you to get the most out of your stamp pads.  You can create additional shades and add depth to your projects.


    On the first card we used the little sprig in the set.  While I was working with a Valentine theme, you could ink this sprig with a variety of colors and use it all year long.  

    • Ink your stamp in the color of your choice and stamp it on your card.
    • Before you reink, move your hand over slightly and then stamp it again.  
    • The lights, darks and varying shades add more interest and depth to your project.


    On the second card we played with the base and shade stamp sets.  While you can stamp them in any order, I like to start with the solid stamps first, then stamp the detailed stamps on top.

    Ink your stamp in the color of your choice and "stamp it off" on scratch paper.
    Then stamp your image again on your project.
    Ink up the detailed image and then stamp it on top.  

    Tips for lining up the stamps:
    Use a block that is a little bit bigger than your image so that you can see excess block all the way around the edge of your image.  This will help you to see through the blocks for proper alignment.
    I find that it helps if I stand up so that I can look straight down on my image.
    Look for a particularly distinguishing characteristic of the stamp and use that to align it.  On the rose, I used the two leaves/petals that have that v shaped cut away between them.
    Practice makes perfect.  Experiment a few times on scratch paper until you get the hang of it.

    You can purchase the stamp of the month, papers and inks featured on my website.  

    Wednesday, January 06, 2016

    Workshop Kits featuring CTMH new Thin Cuts

    I am so excited to share Close To My Heart's new Thin Cuts at my workshop Saturday.  While I am a big fan of Cricut and I can't imagine crafting without it... there are many who can't afford the machine or think it is too "techy" for them....well Thin Cuts might be the perfect answer!!


    You can use the thin cuts in your die cut/embossing machines like cuttlebug and Big Shot.  I will be demonstrating how to use them and incorporating them into my projects at my workshop this weekend.

    We will be using the Springtime Wishes Thin Cuts


    Along with the Springtime Wishes Stamp Set


    I welcome your business!  You can purchase all of these items on my retail website.  Please let me know if you have any questions!